

In spite of the fact that Apple has planned the iPhone, iPod touch, and iPad to be easy to learn, some of the time you may need an introduction on the rudiments. Here’s a breakdown of the major multitouch gestures, navigation, Home screen tips and deceives, and multitasking features you’ll have to dominate your iOS gadget. Here we will see briefly how we can do navigation on iPhone and iPad.
What we will see here?
Gestures and Techniques
One of the navigation basics on iPhone and iPad include gestures and techniques. On the off chance that you’ve at no other time claimed a multitouch gadget from Apple, you might be new to insane expressions like pinch-to-zoom and the contrast among flick and swipe. Have no dread: While a portion of these gestures may have odd names, they’re adequately simple to get.
Tap:
One of the navigation basics on iPhone and iPad include taps. As clicking is to a desktop PC, so is tapping to an iOS gadget. Tapping is the most well-known and fundamental gesture.

Double-tap:
Tap an item twice in progression to impact a double-tap. Double-taps are essentially utilized for zooming in or out on text.

Tap, hold, and drag:
For certain capacities, like highlighting text, copying and pasting, or deleting and moving apps, you’ll need to tap and hold down on the screen. At the point when you do this on a piece of text, it will highlight in blue, and editing handles—vertical lines with blue dabs—will appear on one or the other side of the highlighted region. You can tap, hold, and, while holding down, drag your finger to increment or decline the determination. Dragging additionally becomes an integral factor for moving articles in apps, drawing, and swiping and flicking.
Flick and swipe:
One of the navigation basics on iPhone and iPad include flicks and swipes.Swiping is one of your essential navigational tools: You utilize a left or right swipe to travel through app pages on your Home screen or pictures in the Photos app; you go through an or down swipe to peruse text in Safari, iBooks, Newsstand, or somewhere else. It’s probably the most straightforward gesture to learn.
A flick is actually similar to a swipe, just quicker: Your gadget upholds inertial scrolling, which implies that the quicker or more slow you move your finger, the quicker or more slow substance will move. In the event that you need to make quick work of a page rapidly, simply flick your finger upward in a quick movement.

Note: All flicking and swiping on your gadget is converse, implying that when you drop your finger down (as such, swipe down), you’re really moving whatever is on the screen upward. This goes well in reality, yet coming from a PC, where scrolling down on a trackpad or mouse really look over the window down, it very well may be somewhat bewildering at first.

Pinch:
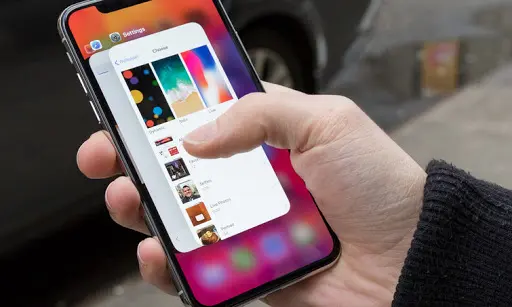
One of the navigation basics on iPhone and iPad include pinch. To zoom in or to open something, place your thumb and index finger, pinched together, on screen and spread them separated. To zoom out, do the opposite: Start with your thumb and index finger outwards, and afterward pinch them together.

Rotate:
You can even rotate a few components with at least two fingers. Simply place two fingers on the screen and make a roundabout signal, clockwise or counterclockwise.
iPad 2-explicit multitasking gestures:
If you own an iPad 2 running iOS 5, you can utilize extra gestures to perform multiple tasks on your gadget, which incorporate a four-or five-finger swipe and pinch.
Navigation Basics iPhone and iPad
Since you’ve ventured out into the iOS world with multitouch gestures, it’s an ideal opportunity to figure out how to explore your device. We’ll go over where your apps are put away, how to sort out them, search for them, and erase them.
The Home screen:

At the point when you first turn on your device, you’re brought to the Home screen. Here, you’ll see a mix of icons amassed into lines, and a couple of extra icons accumulated in the silver Dock along the lower part of the screen. The Home screen is where your apps live, and where you can dispatch them. Since only 16 apps will fit on one Home screen (20 on the iPad), you can have diverse application pages or screens for figuring everything out your apps (up to 11). Preposterous, you’ll see a progression of spots, with one highlighted in white; these spots hint at the number of app pages you have. Swipe left or choose to move between various pages.
The Dock:

The silver clear bar along the bottom part of your Home screen is known as the Dock. If you’ve had a go at swiping between application pages, you’ll notice the icons in the Dock don’t change. That is because the Dock is for applications you most in many cases use; as opposed to swiping starting with one page then onto the next to find an application, you can drop it clearly into the Dock for basic access. You can collect four applications in the Dock.
Search in Spotlight:

You can search for each email message, page, and application on your device, or search through Google or Wikipedia, by swiping directly on your Home screen until you arrive at Spotlight. (In case you’re on the main Home screen page, squeezing your Home button additionally brings the Spotlight screen.) To search, simply type your question in the text box at the top.
Open and close an application:

Want to dispatch an application? To open it, you should simply tap its icon. When it’s open, you can get back to the Home screen whenever by squeezing the Home button.
Adjust and erase apps:
To modify the request for your icons, tap and hold any icon on the Home screen. Following a couple of moments, all your application icons, including the one you’re holding, will begin to squirm, and a little dark X will spring up in every icon’s upper left corner. When they do this, you can revise any apps on the Home screen, or even drag them into or out of the Dock. In the event that you’ve introduced an outsider application you don’t need any longer, you can tap the X to erase it (you can’t erase the apps that came preinstalled on your device). At the point when you’re done, press the Home button, and your icons will quit squirming and stay in their new area. You can likewise revise your icons and Home screen pages through iTunes when you associate your device to your PC.

Note that you’re not ready to erase the inherent apps that accompany your iOS device. These incorporate Camera, Photos, YouTube, Clock, Weather, and the sky is the limit from there. You’ll have the option to tell which apps you can’t erase—they don’t don the dark X. You can move around these inherent apps as you would prefer, notwithstanding.
Using Folders
One of the navigation basics on iPhone and iPad include using the folders.Having a lot of apps dissipated on your Home screen is OK in the event that you don’t have too much, yet when you begin gathering an assortment, you can utilize application folders. An envelope is a gathering of apps, addressed by a solitary icon, on your Home screen. Every organizer sports smaller than normal icons addressing the apps inside, alongside a general name. At the point when you tap an organizer, the Dock blurs and slides down, accounting for a perspective on the envelope’s substance. Inside, you’ll discover the name and icon for each application. Tap any application to dispatch it, or tap anyplace outside the envelope to get back to the Home screen.

To make a folder,
Start by tapping and holding any application icon to enter edit mode; after the icons start to squirm, drag an application on top of another application. At the point when you discharge the application, you’ll make a folder, which will open and show both apps. Of course the folder is named dependent on the App Store category for one of the initial two apps in the organizer. On the off chance that you need to customize this name, simply tap inside the field (while still in edit mode) and enter something new. At the point when you’re set, press the Home button to exit edit mode.
To add another app to the folder,
return edit mode and drag the ideal app onto the folder icon. Rehash until you’ve added all the apps you need (up to 12 for every folder on the iPhone or iPod contact; 20 on the iPad), and afterward press the Home button to exit edit mode.
Edit the actual folder,
its name, substance, or the format of the apps inside, you can either enter edit mode and afterward tap the envelope, or, while the envelope is open, tap and hold any icon inside. You would then be able to tap the folder’s name to transform it, drag apps inside the envelope to revamp them, drag an application out of the folder to return it to the Home screen, or tap an application’s Delete button to totally erase it from your device. Dissimilar to apps, folders don’t have a Delete button; to erase folder, you should eliminate all the apps from it.
Oversee folders from iTunes:
iTunes has since a long time ago permitted clients to oversee introduced apps when syncing, and you can edit your folders as well, utilizing your mouse and keyboard. At the point when your device is associated with your PC, the Apps tab in iTunes allows you to pick which apps to sync, just as conclude how to coordinate these apps. Drag an application onto another application and, after a slight deferral, a folder is made—similarly as though you’d played out a similar activity on your device. You get a similar editable folder name, and you can adjust icons inside the folder. Since you’re utilizing a PC, you don’t have to snap and hold to enter the wiggling icon edit mode; you can snap and drag whenever. Likewise, to edit a current folder, simply double tap it.
Multitasking on iOS device

Opening and closing an app is simple:
Tap the app to open it, and afterward press the Home button to close it. In any case, when you exit, you’re not really closing down the app: You’re freezing it set up, or sending it to run in the background. This implies you can have numerous active apps running at any one time, and you can even switch between active apps without getting back to the Home screen.
Frozen apps versus background apps:
Sometimes you need an application to continue accomplishing something when it’s not in the foreground. Consequently, Apple permits applications to perform tasks in the background utilizing a few instruments. One of these instruments is the push-notification framework; another permits music applications to continue to play while the user switches to another application; one more permits tasks, for example, photograph uploads, to keep running in the background regardless of whether you switch out of the program playing out the transfer. In the event that your third-party application doesn’t consolidate one of these background highlights, it will “freeze”, or, in other words it will recall whatever you were simply doing when you re-open it, yet won’t handle any information in the background.

The multitasking bar:
You can rapidly switch between applications by raising the multitasking bar. To do as such, rapidly double-press the Home button; a bar underneath the Dock will ascend from the lower part of the screen, flaunting the applications most as of late run. To switch to an alternate application, tap its icon.

Multitasking shortcuts:
One of the navigation basics on iPhone and iPad include the multitasking shortcuts.As well as holding a rundown of your most as of late utilized applications, the multitasking bar several other flawless shortcuts for your gadget. In the event that you swipe right, you’ll raise an optional arrangement of controls. On the iPhone or iPod touch, you can secure your gadget’s orientation portrait mode and control the music presently playing on your gadget (it defaults to the Music application, however you can likewise control music from third-party applications). Swipe to the right once more, and you’ll get a slider for controlling volume. On the iPad, you can bolt orientation, change your gadget’s brightness and volume, and control music.
Conclusion
Ordinarily it seems like the explanation individuals don’t comprehend the essential navigation in iOS is on the grounds that they are making it a lot harder than it should be. Getting around is actually a significant simple interaction. Failing to remember all past information about PCs, on the off chance that you simply fully trust the navigation, you’ll comprehend it all the more rapidly.
There are a couple of various sides to the iOS navigation measure. There is the home screen layout, gestures, editing text, the inquiry screen, making envelopes, and performing various tasks bar. On the off chance that you become familiar with these couple of essential parts, you’ll have all you require to know to move about your gadget, be it an iPhone, iPad, iPad Mini, or iPod Touch.


